Interactive Sign Up form using HTML, CSS, and JavaScript
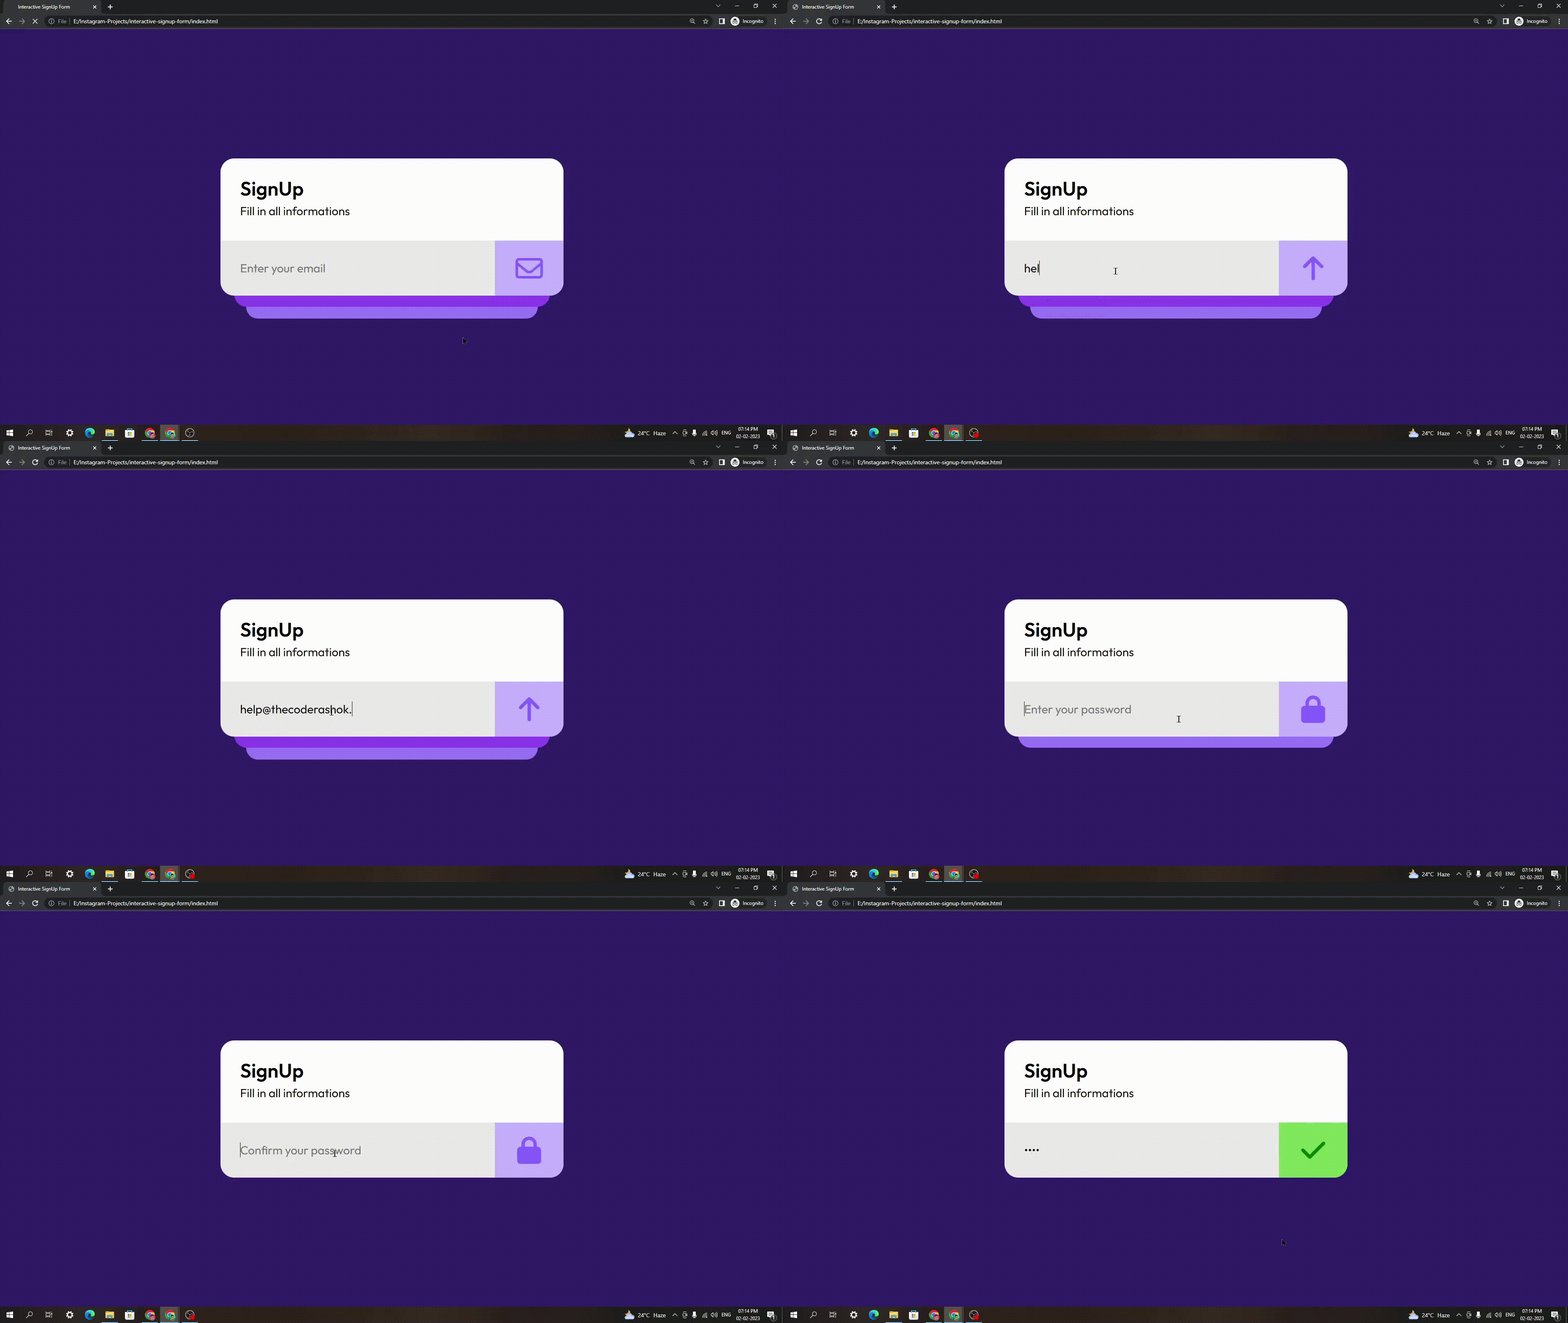
Hello visitors welcome to The Coder Ashok Blog. In this article we will build an Interactive Sign Up form using HTML, CSS, and JavaScript, also a Submit Button with micro animation. Let's see How to make Interactive Sign Up form template free.
Preview of the project

How to create Sign Up Form using HTML, CSS, and JavaScript?
To build this Sign Up form we will use HTML(Hypertext MarkUp language), CSS(Cascading Style Sheets), and JavaScript. We will create a very minimal and beautiful Sign Up from UI.
| Code By | Ashok Kumar Sahoo |
| Project Source code | Copy from the code highlights and CodePen live preview |
| Build with | HTML, CSS, JavaScript |
| Responsive | No |
| Dependencies | FontAwesome Icon, Google Font |
HTML Code of Interactive Sign Up form
In this HTML code firstly in Head tag, we have Font Awesome icon pack CDN Link to use font awesome icon in Submit Button. Also we have linked to our stylesheet which named as style.css. Before </body> tag we linked our JavaScript file which named as main.js
Also Read: Email Input Validation using HTML, CSS, and JavaScript
html<!DOCTYPE html> <html lang="en"> <head> <meta charset="UTF-8" /> <meta http-equiv="X-UA-Compatible" content="IE=edge" /> <meta name="viewport" content="width=device-width, initial-scale=1.0" /> <link rel="stylesheet" href="style.css" /> <link rel="stylesheet" href="https://cdnjs.cloudflare.com/ajax/libs/font-awesome/6.2.1/css/all.min.css" integrity="sha512-MV7K8+y+gLIBoVD59lQIYicR65iaqukzvf/nwasF0nqhPay5w/9lJmVM2hMDcnK1OnMGCdVK+iQrJ7lzPJQd1w==" crossorigin="anonymous" referrerpolicy="no-referrer" /> <title>Interactive SignUp Form</title> </head> <body> <div class="signup_form"> <div class="heading_wrapper"> <h4>SignUp</h4> <p>Fill in all informations</p> </div> <form> <div class="input_container active"> <input type="email" class="input_field" id="user_email" placeholder="Enter your email" /> <button class="submit_btn" type="button" id="submitBtn"> <span class="icon"> <i class="fa-regular fa-envelope"></i> </span> <span class="icon arrow"> <i class="fa-solid fa-arrow-up"></i> </span> </button> </div> <div class="input_container"> <input type="password" class="input_field" id="user_password" placeholder="Enter your password" /> <button class="submit_btn" type="button" id="submitBtn2"> <span class="icon"> <i class="fa-solid fa-lock"></i> </span> <span class="icon arrow"> <i class="fa-solid fa-arrow-up"></i> </span> </button> </div> <div class="input_container"> <input type="password" class="input_field" id="user_confirm_password" placeholder="Confirm your password" /> <button class="submit_btn confirm" type="button"> <span class="icon"> <i class="fa-solid fa-lock"></i> </span> <span class="icon arrow"> <i class="fa-solid fa-check"></i> </span> </button> </div> </form> </div> <script src="main.js"></script> </body> </html>
CSS Code of Interactive Sign Up form
In the CSS code we have imported Outfit Google font, so our main font-family will be Outfit Font.
css@import url("https://fonts.googleapis.com/css2?family=Outfit:wght@300;400;500;600&display=swap"); * { margin: 0; padding: 0; box-sizing: border-box; font-family: "Outfit", sans-serif; } body { position: relative; width: 100%; height: 100vh; background-color: #311e68; display: flex; justify-content: center; align-items: center; } .signup_form { position: relative; width: 35rem; height: 14rem; background: transparent; border-radius: 1.4rem; } .heading_wrapper { position: absolute; width: 100%; height: 60%; top: 0; left: 0; z-index: 8; background: white; border-radius: 1.4rem 1.4rem 0 0; padding-left: 2rem; padding-top: 1.8rem; display: flex; flex-direction: column; justify-content: flex-start; align-items: flex-start; } h4 { font-size: 2rem; } p { font-size: 1.2rem; margin-top: 0.3rem; } form { position: absolute; width: 100%; height: 40%; bottom: 0; left: 0; border-radius: 0 0 1.4rem 1.4rem; display: flex; flex-direction: column; justify-content: center; align-items: center; /* background-color: #EAEAEA; */ } form .input_container { position: absolute; width: 100%; height: 100%; left: 0; top: 0; border-radius: 0 0 1.4rem 1.4rem; border: none; background-color: #eaeaea; overflow: hidden; transition: transform 0.3s ease-in-out, height 0.4s ease; transform-origin: center; transform-style: preserve-3d; } .input_container input { width: 80%; height: 100%; border: none; outline: none; padding: 2rem; font-size: 1.2rem; background-color: transparent; } .input_container.active { transform: translateY(0) scale(1) !important; background-color: #eaeaea !important; } .input_container.center { transform: translateY(25%) scale(0.92) !important; } .input_container.done { transform: translateY(0%) scale(1) !important; height: 0 !important; background-color: #eaeaea !important; } .input_container.active button { display: block; } form .input_container:nth-child(1) { z-index: 3; } form .input_container:nth-child(2) { transform: translateY(25%) scale(0.92); background-color: #8f44ee; z-index: 2; } form .input_container:nth-child(3) { transform: translateY(50%) scale(0.85); background-color: #9878f8; z-index: 1; } .submit_btn { position: absolute; right: 0; bottom: 0; width: 20%; height: 100%; background-color: #c8b5ff; z-index: 9; display: none; border-radius: 0 0 1.4rem 0; border: none; outline: none; cursor: pointer; pointer-events: none; transition: background-color 0.5s cubic-bezier(0.88, 0.28, 0, 1.33); } .submit_btn .icon { position: relative; width: 100%; height: 100%; font-size: 2.8rem; display: flex; justify-content: center; align-items: center; color: #8a62ff; transition: 0.5s cubic-bezier(0.88, 0.28, 0, 1.33); } .submit_btn.active .icon { transform: translateY(-100%); } .submit_btn.confirm.active { background-color: #79d758; } .submit_btn.confirm.active .icon.arrow { color: #027500; }
JavaScript Code of Interactive Sign Up form
In the JavaScript code we’ve got some custom variables. We use For Loop to add function on Input fields. Also we have create JavaScript Event Listener OnClick function to Submit Buttons.
javascriptconst user_email = document.getElementById("user_email"); const user_password = document.getElementById("user_password"); const user_confirm_password = document.getElementById("user_confirm_password"); const submitBtn = document.getElementById("submitBtn"); const submitBtn2 = document.getElementById("submitBtn2"); const input_container = document.querySelectorAll(".input_container"); const inputFields = document.querySelectorAll(".input_field"); const submitBtns = document.querySelectorAll(".submit_btn"); let emailContainer = input_container[0]; let passwordContainer = input_container[1]; let confirmPasswordContainer = input_container[2]; for (let i = 0; i < inputFields.length; i++) { inputFields[i].addEventListener("input", function () { if (this.value !== "") { submitBtns[i].style.pointerEvents = "all"; submitBtns[i].classList.add("active"); } else { submitBtns[i].style.pointerEvents = "none"; submitBtns[i].classList.remove("active"); } if ( (user_password.value !== "") & (user_confirm_password.value !== "") & (user_password.value == user_confirm_password.value) ) { submitBtns[2].classList.add("active"); } else { submitBtns[2].classList.remove("active"); } }); } submitBtn.addEventListener("click", () => { emailContainer.classList.add("done"); emailContainer.classList.remove("active"); passwordContainer.classList.add("active"); confirmPasswordContainer.classList.add("center"); }); submitBtn2.addEventListener("click", () => { passwordContainer.classList.add("done"); passwordContainer.classList.remove("active"); confirmPasswordContainer.classList.add("active"); confirmPasswordContainer.classList.remove("center"); });
Final Output of Interactive Sign Up form
Here is the final output preview of Interactive Sign Up form, you can use and edit for your personal project and learning.
Conclusion
Thank you for reading this article. We hope that, you liked this project, also let us know in comments, if you have any queries about Interactive Sign Up form.
